
As Canadians, two months of the year is never enough of a camping season.
Believe it or not, the best time to go camping is any time—as long as you’re prepared!
We camp in snow, slush, sleet, and ice—even when the temperatures have plummeted well below freezing.
In our experience snow is preferable to rain or melting conditions because it’s way easier to stay dry.
The thing about snow, though, is that it can be tricky to travel and set up in when there’s so dang much of it.
Regardless of how much snow you’re dealing with, it’s important to have the right gear and know-how for staying safe.
With that said, here are our top tips for camping in the snow.
1. Layer up to stay warm and dry

When camping in snowy conditions, dressing in layers is key to staying warm and dry.
Start with a moisture-wicking base layer.
This pulls sweat away from your skin to avoid dampness, which can lead to chills.
Add a mid-layer for insulation.
Fleece or down are great options that trap body heat effectively.
Top it off with a waterproof and windproof outer layer.
This protects against the elements and helps retain warmth.
Your extremities lose heat quickly, so don’t forget gloves, a hat, and warm socks.
Adjust your layers as needed.
If you’re too warm, remove a layer before you start sweating.
It’s better to have extra layers and not need them than to be missing a crucial piece of gear.
Keep extra clothes handy in case you get wet.
Change into dry clothes immediately if your layers become damp.
2. Choose snow-friendly footwear

When camping in the snow, the right footwear makes all the difference.
You’ll want boots that are insulated and waterproof to keep your feet warm and dry.
Insulated boots: These are designed to trap heat, providing warmth in cold temperatures.
Waterproof or water-resistant: Your boots should prevent snow from seeping in.
Look for boots with a sturdy grip on the ice.
Grippy soles: They help prevent slips and falls on slick surfaces.
Consider the height of your boots.
Tall boots: They shield your lower legs from deep snow.
Don’t forget about accessories like gaiters.
Gaiters: They add an extra layer of protection against snow entering your boots.
For backcountry travel, additional gear may be necessary.
Snowshoes: They distribute your weight and prevent sinking into deep snow.
Skis: Great for faster and more efficient movement over snowy terrain.
Ice cleats: They attach to your boots for better traction on ice.
Remember to break in your boots before your trip.
Breaking boots in: This prevents blisters and discomfort during your camping adventure.
Layer your socks for better insulation.
Wool socks: They wick away moisture and add warmth.
Layering: Wear a thinner base layer and a thicker outer layer for best results.
Down booties (pictured above): Optional, but a great choice for keeping your feet warm while hanging out in your tent at camp
Choosing the right snow-friendly footwear can make your winter camping experience enjoyable and safe.
3. Protect your eyes from snow blindness

Snow blindness is a temporary loss of vision due to the sun reflecting off snow.
The condition is like a sunburn but on the cornea, the clear covering in front of the eye.
You’ll want to shield your eyes from UV rays, which can be quite intense in snowy environments.
When you’re packing for a snowy adventure, keep eye protection on your list.
Wrap-around sunglasses or snow goggles are a must-have.
They should block out 100 percent of UV rays to minimize the risk of snow blindness.
- Look for sunglasses labeled with 100% UV protection.
- Go for options with a wrap-around style to prevent light from entering from the sides.
- When at higher elevations or in extreme cold and wind, use snow goggles.
- Check the goggles have UV-protection specifications.
4. Consider using a sled or pulk instead of a backpack
")
When you’re gearing up for winter camping, think about taking a sled or pulk.
They’re a game-changer on snowy terrain.
Sleds:
- Your gear glides over snow without weighing you down.
- It’s easier on your body, especially over flat stretches.
Pulks:
- They come with a rigid harness, making them more stable than typical sleds.
- They’re excellent for hauling heavier loads you wouldn’t want on your back.
Benefits:
- Less strain on your body: You’ll save your back and shoulders from the strain of a heavy pack.
- More gear: You can carry those extra comforts that make camp life in the snow cozy.
What to consider:
- Terrain: Sleds work best on flat or gently rolling landscapes.
- Equipment: A simple sled can be effective, but specialized pulks provide greater control and ease of use.
For the best experience, spend some time practicing with your sled or pulk before heading out.
Remember to pack critical items on top to access them quickly.
To avoid damage in freezing temperatures, protect sensitive gear like electronics.
5. Bring a portable snow shovel

When you’re planning a winter camping trip, don’t forget your portable snow shovel.
It’s a versatile tool that can make your experience a lot smoother.
Why you need it:
- Creating a Tent Site: Level off the ground and create wind barriers for your tent.
- Clearing Snow: Make paths around your campsite for easier movement.
- Safety: You can use it to dig out someone or something buried under the snow.
Tips for choosing a shovel:
- Look for a lightweight, yet durable design.
- Telescoping handles are great for portability.
- Flat-edged shovels help with cutting into the snow.
Using your shovel:
- Dig a tent platform: This gives you a flat area to set up your tent.
- Craft wind barriers: Stack blocks of compacted snow around your tent.
- Transport snow: Carry snow to your camp stove where you can melt it down for water.
6. Bring snow or ice tent stakes
")
When camping in snowy conditions, traditional tent stakes often can’t grip well.
Snow and ice stakes are wider and longer, designed to anchor your tent in the snow securely.
They typically feature flat surfaces to hold down in the snow better than narrow stakes.
Here’s what you need to know about using them:
- Choose stakes that are at least 12 inches long for stability.
- You’ll need a minimum of four stakes, one for each corner of your tent.
When setting up your tent:
- Stomp down the snow where you plan to pitch your tent.
- Insert the stakes at a 45-degree angle away from the tent.
- Pack snow around the stakes to solidify their hold.
Tip: After stomping the snow, let it sit for a while.
It’ll harden and provide a firmer base for your stakes.
Remember not to skimp on quality.
Investing in durable stakes pays off.
They’re less likely to bend or break in harsh weather.
You might come across a method known as “deadman anchoring” when stakes won’t hold.
This involves burying an object tied to your tent’s guy line in the snow.
However, it’s a good idea to have a set of proper snow stakes as your first line of defense against the wind.
If you’re interested in a quick guide on staking a tent in snow without tying knots, visit How to Stake a Tent in the Snow Without Tying Knots.
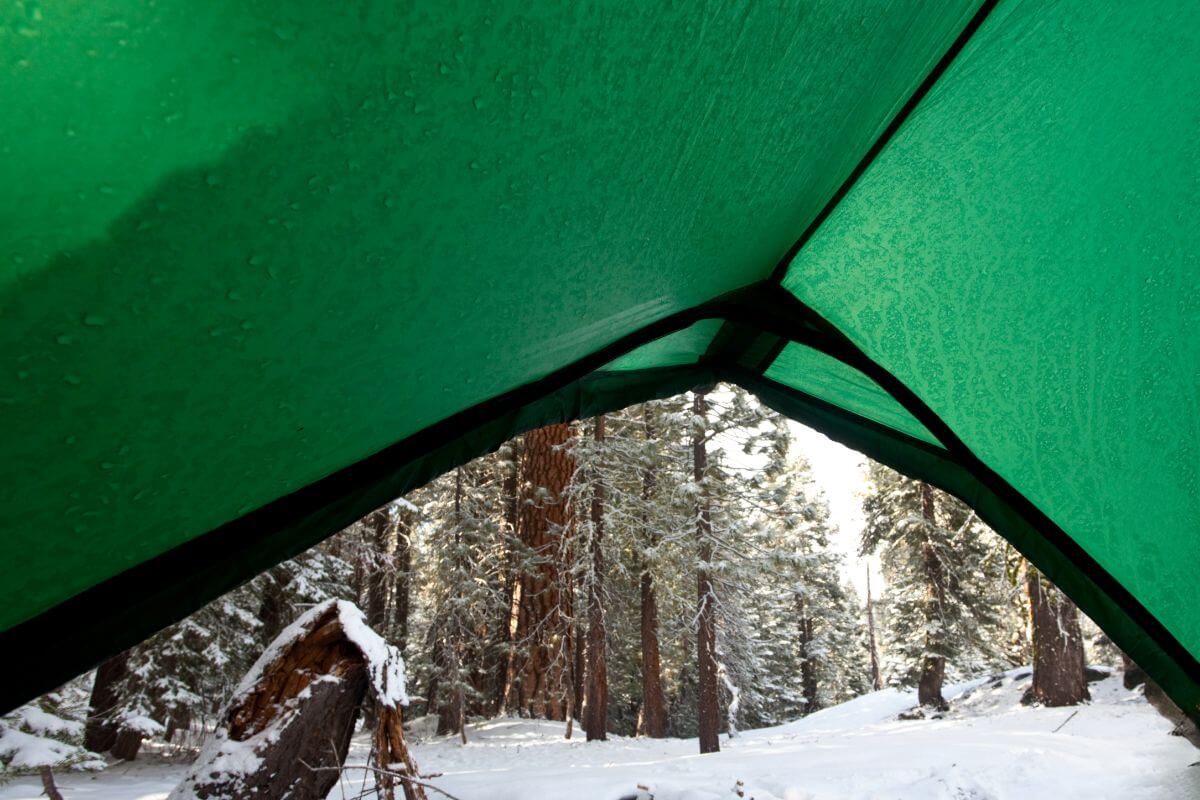
7. Pick a sheltered campsite
")
When you’re camping in the snow, selecting a sheltered spot is key.
You’ll want to find an area shielded from the wind.
Scout for natural windbreaks, like clusters of trees or large boulders.
Check the location for avalanche dangers before you settle in.
It’s better to be safe, so visit the American Institute for Avalanche Research and Education before your trip for safety courses.
Consider the sun’s path.
A spot that catches the morning sun can help warm you up and melt any overnight ice.
Here’s a simple checklist to guide you:
- Look for a natural barrier against the wind
- Avoid areas prone to avalanches
- Aim for a spot that gets morning sunlight
- Stay away from fragile vegetation
Your campsite’s location can make or break your winter camping experience, so take your time finding the right spot.
8. Cold campers: Dig out a snow trench for your tent pad

When you’re winter camping, a good shelter starts with your tent pad.
A snow trench provides insulation and wind protection.
Here’s how to dig a snow trench:
First, choose a spot that’s shielded from the wind.
Look for natural snowdrifts; they can serve as a barrier.
Next, you’ll need a sturdy shovel.
Start by marking the perimeter of your tent.
Now, dig down about 2 to 4 feet.
You’re aiming for walls high enough to block the wind.
The trench should be slightly longer and wider than your tent.
After digging, pat down the snow inside your trench.
This compacts the snow for a firm sleeping area.
Don’t forget to angle the walls inward as you dig down.
This creates a more stable structure.
For extra insulation, lay down a ground cover.
Your tent goes on top of this layer.
You’ve just made a cozy, wind-resistant tent pad!
9. Cold campers: Use groundsheets and closed-cell foam pads to insulate your floor
")
When you’re camping in the snow, staying warm is key.
A solid groundsheet can be a game-changer.
Think of it as a barrier between you and the cold earth.
Place it under your tent to prevent heat loss.
Now, about sleeping pads.
Choose a closed-cell foam pad.
Their design traps air and insulates.
Even better, stack two pads for extra warmth.
You’ve got your inflatable pad for comfort.
Then, the foam pad right beneath it acts as a shield against the cold.
Remember, the ground is your biggest chill factor at night.
So, double up those layers to keep the cold at bay.
Quick tip: Check the R-value.
Higher R-values mean better insulation.
And don’t skimp on size.
Cover the entire tent floor, corner to corner.
10. Cold campers: build snow walls around your tent

When camping in snow, building snow walls can significantly boost your tent’s warmth.
Snow walls act as windbreaks, trapping heat and preventing chilly drafts from penetrating your camp.
You’ll find it’s like adding an extra layer to your shelter.
How to Build Snow Walls:
- Choose the right spot: Look for natural wind barriers, like trees or rocks.
- Gather snow: Make sure it’s packable for sturdy walls.
Building Tips:
- Pack the snow: Firm walls withstand wind better.
- Use a shovel: It’ll save you time and shape the walls easily.
Wall Height and Thickness:
- Aim for at least a couple of feet high.
- Make them thick for durability and insulation.
Leave Room for Ventilation:
- Don’t seal your tent completely.
- Allow for airflow to prevent moisture buildup inside your tent.
In snowy conditions, consider the advice provided by The Geeky Camper on using snow walls effectively for insulation.
While it may require effort, the payoff in warmth and wind protection is worth it.
You’ll sleep better and enjoy your winter adventure more when you’re cozy in your reinforced snow fortress!
11. Hot tenters: stomp down snow to pack down your tent pad
")
When camping in the snow, creating a solid foundation for your hot tent is key.
Start by stomping down the snow where you plan to set up.
Your goal is to make the snow as dense and firm as possible.
This process is called “snow tamping” and it helps prevent you from sinking into the snow while inside your tent.
Wear snowshoes or skis to evenly distribute your weight and increase the area you cover with each step.
Work methodically, moving from one end to the other, and then side to side.
After an initial pass, let the snow settle for a while.
The snow will harden up, giving you a sturdier surface.
Next, give it another tamp down to catch any spots you’ve missed and to ensure it’s packed evenly.
Now, it’s time to set up your tent on this newly created snow platform.
Carefully lay out your tent and secure it.
Remember, the flatter and more compact your pad, the better insulation you’ll have from the cold ground.
Packing your snow correctly also minimizes the risk of melting caused by the warmth of your hot tent stove.
There’s no rush; take your time to do it right.
A well-prepared tent pad makes your winter camping experience much more enjoyable.
12. Hot tenters: Shovel snow over the outer edges of your tent
")
When you’re hot tenting in the snow, shoveling snow over the tent’s edges can boost your warmth.
Snow is a natural insulator.
It traps air and reduces heat loss.
This technique creates a barrier against the cold.
It’s easy to do.
Simply pile up snow around the sides of your tent.
Make sure you pack it down.
Packed snow won’t fall away as easily.
You’re adding an extra layer between you and the elements.
This method also keeps the tent anchored.
In windy conditions, your tent stays more secure.
There’s no need to worry about a breeze slipping under the tent fabric.
It’s like wrapping your tent up in a cozy snow blanket.
Remember to leave space for the tent’s ventilation.
You don’t want moisture to build up inside.
Keep the air flowing freely to avoid condensation.
So grab a shovel.
And start piling up that snow around your hot tent.
13. Hot tenters: use evergreen boughs to insulate your floor

When camping in snow, insulating your tent’s floor is key to staying warm.
Evergreen boughs are a natural and effective insulating material.
They create a barrier between the cold ground and your tent.
Here’s how to properly use evergreen boughs for insulation:
- Gather evergreen boughs from surrounding areas if permitted—check with the park or area you’re camping in.
- Lay them flat to form a dense, even layer on the ground.
- Place the boughs inside your tent before setting up your sleeping area.
- It’s best to use boughs from fallen trees to minimize environmental impact.
This method is inspired by traditional practices and is still used today.
You’ll find that it’s not only sustainable but also quite effective.
The boughs’ natural structure traps air and insulates against the cold.
Enjoy a more comfortable sleep while embracing an age-old technique.
14. Regularly clean the snow off your tent

Snow accumulation on your tent can cause a few problems.
The weight of the snow can cause the tent’s frame to collapse.
If the snow melts, water might seep through, making everything damp.
It’s also harder to warm up your tent when it’s coated in snow.
Follow these steps to keep your tent snow-free:
- Check for snowfall: Do this before you sleep and right after you wake up.
- Use a broom: Gently brush off snow from the top and sides of the tent.
- Don’t let snow build up: It’s easier to remove fresh, powdery snow than wet, heavy snow.
Stay warm and dry by keeping snow off your camping shelter.
15. Consider sleeping on a camping cot

When camping in snowy conditions, keeping dry is a top priority.
A camping cot can elevate you off the cold, wet ground.
We use the Helinox Cot One and absolutely love it.
This extra height can prevent moisture from snow and earth from seeping into your sleeping space.
Cots offer better air circulation beneath you.
This means you’ll have extra insulation from the cold soil.
To boost warmth, add a layer like a foam pad or sleeping pad on top of the cot.
Some campers even use specialized cots designed for cold weather with built-in insulation.
Setup tips:
- Choose a flat surface to prevent wobbling.
- If the cot has metal frames, cover them with fabric to avoid cold spots.
Insulation tips:
- Place an inflatable sleeping pad on the cot.
- Tuck in a wool blanket underneath for extra warmth.
Remember, a cot’s elevation can be a double-edged sword.
You may experience more exposure to cold air circulating underneath.
Be sure to properly insulate your sleeping area to counteract this effect.
16. Alternatively, sleep on a high R-value air mattress or sleeping pad

When camping in the snow, staying warm is paramount.
Your choice of sleeping surface is a key factor in insulation.
A high R-value in a sleeping pad implies better insulation.
The higher the R-value, the better the pad retains your body heat.
Low temperatures require a pad with a high R-value.
Commonly, a pad with an R-value of 5 or higher is suitable for winter.
Types of pads
Foam pads are a great, durable choice.
Air mattresses or inflatable pads often have higher R-values and are more compact.
Some pads combine foam and air for an optimal balance.
Look for features:
- Quilted tops
- Reflective materials
- Multiple air chambers
Consider the weight: You’ll want a balance between warmth and portability.
Not all pads are equal: Some are better for summer.
Others, like the Therm-a-Rest NeoAir Xtherm, are designed for cold weather.
Here’s a quick breakdown:
- Foam pads: R-value of 1-2
- Air pads: wider R-value range
- Winter-specific pads: R-value 5 and above
You’re now equipped to pick a warm, high R-value sleeping surface.
Happy winter camping!
17. Learn how to melt snow properly for hydration

When you’re camping in the snow, staying hydrated is key.
You’ll need to melt snow for drinking water, and doing this the right way can make all the difference.
Here’s how to get it done:
First, choose the right snow.
Select clean, fresh snow that’s free from dirt or debris, as suggested by experts on winter camping.
Avoid the top layer because it might contain impurities.
You’ll need a sturdy pot for melting.
Go for a stainless steel or titanium pot since these conduct heat well and are durable.
Put a little water in the bottom of the pot before adding snow.
This prevents burning and ensures even melting.
Heat the snow slowly.
Stir occasionally to speed up the melting process.
Once melted, boiling the water can make it safer to drink.
Keep an eye on your hydration levels.
Even in cold weather, your body loses water through breath and perspiration.
Drink frequently to avoid dehydration.
Carry your water in an insulated bottle to prevent refreezing.
Remember, dehydration in cold conditions can sneak up on you, so drink water regularly.
18. Beware of temperatures dropping extremely low

When camping in snow, temperatures can plummet without warning.
You’ll be facing an environment that doesn’t forgive mistakes.
Even at night, cold weather intensifies, with clear skies or wind further dropping temperatures.
Double-check your sleeping gear is rated for the expected chill.
Consider a sleeping bag with a lower temperature rating than you think you’ll need.
- Layers are your best friend.
- Wear insulating materials like fleece or down, and don’t forget a windproof outer layer.
- A hat and gloves are a must; they keep body heat from escaping.
Stay hydrated, but avoid alcohol, as it can lower your body temperature.
Pack a stainless steel water bottle that won’t crack in the cold.
A warm drink before bed can provide internal heat, aiding a restful night.
Be aware of the signs of hypothermia.
Shivering uncontrollably is an early indicator.
Slurred speech, clumsiness, and confusion are red flags.
If you suspect hypothermia, seek immediate warmth and consider ending your trip.
Proper preparation is the difference between enjoyment and danger.
Check the forecast, but be ready for unpredictability.
Tent placement is strategic; avoid valleys where cold air settles and high peaks where winds are formidable.
Remember to leave no trace by respecting the wilderness and practicing responsible camping.
Your safety and the preservation of the environment will let you enjoy many more winter adventures.
19. Also beware of temperatures hovering around or above freezing

When temperatures are close to freezing, you’re in a tricky situation.
You may think it’s not cold enough to worry, but this isn’t true.
A bit above freezing can be as dangerous as severe cold.
Wet conditions are likely, possibly leading to hypothermia.
Dress in layers; you can always take something off if you’re too warm.
Wear moisture-wicking materials directly on your skin.
Add an insulating layer, like fleece, for trapping body heat.
Don’t forget a waterproof outer layer to stay dry.
Your sleep system should include a well-insulated sleeping pad.
This is vital for preventing cold ground from sapping your body heat.
Consider a sleeping bag that’s rated for colder temperatures than you expect.
You might feel too warm at times, but you’ll appreciate it if temps drop overnight.
Keep everything dry, especially clothing and sleeping gear.
Wet gear loses much of its insulating properties.
If you can, keep a separate set of clothing for sleep that’s dry.
A tent with good ventilation can reduce condensation inside.
This means less dampness in your sleeping environment.
And yes, even when it’s cold, you’ll need to stay hydrated.
Your body works harder in cold weather, so drink plenty of water.
If the forecast hints at temperatures around or above freezing, prepare with care.
These conditions can be deceptive, but with the right gear and knowledge, you’ll have a safe trip.
20. Check ice and avalanche conditions beforehand

Before heading out, always check current ice and avalanche conditions.
Your life could depend on local advisories and weather reports.
Areas prone to avalanches require special attention.
Avalanche forecast: Look at regional avalanche forecasts for warning signs.
Terrain analysis: Identify slopes steeper than 30 degrees.
Avoid these areas, as they’re more likely to slide.
Weather patterns: Recent heavy snowfall or warming can increase risk.
Ice stability: On frozen lakes or rivers, verify ice thickness.
At least 4 inches of clear, solid ice is the minimum for walking.
Always tell someone your plans, including route and expected return time.
If you’re unsure about the safety of an area, don’t risk it.
Stay safe and enjoy your snowy adventure.
21. Tell someone where you’re going and when you’ll be back

Before heading out on a snowy camping adventure, always tell a friend or family member your plans.
Include your destination and expected return time.
This information is key if a search and rescue effort becomes necessary.
Choose a reliable person who can raise the alarm if you don’t check in.
Create an itinerary with key details:
- Your name and contact information
- Trip start and end date
- Camping location(s)
- Route(s) you plan to take
- Emergency contacts
Leave a copy of this itinerary with your contact.
Text or call them when you begin your trip and when you return.
If your plans change, keep them updated.
Preferably, use a check-in system:
- Establish check-in times
- Agree on actions if you miss a check-in
Pack a communication device that works in the wilderness.
Satellite phones and personal locators are good options.
Staying connected can be a lifesaver if you get stranded or lost in the snow.
Remember, your safety is paramount.
Taking these steps helps you stay safe and enjoy your winter camping trip.
22. Pack your first aid kit full of winter safety items

When camping in the snow, your first aid kit needs to be tailored for cold-weather accidents.
Common injuries like frostbite and hypothermia become real risks in the snow.
Bandages and gauze: These handle cuts from ice and mishaps with gear.
Antiseptic wipes: Keep infections at bay after any minor accidents.
Thermal blankets: They help maintain body heat if someone’s temperature drops.
Pain relief medication: This can reduce discomfort from injuries.
Remember to toss in some lip balm and skin cream.
The dry, cold air can crack skin and chap lips quickly.
Cold weather can worsen injuries or make them harder to treat, so stay prepared.
A good kit can make a huge difference in your camping experience.
Stay safe and enjoy the winter wonderland!
More about winter camping:
- Tips on how to go ultralight winter camping
- 12 big risks to be aware of on a winter camping trip
- How to poop in the backcountry while winter camping
You might also like:


Elise is an experienced backcountry canoe tripper and winter camper from Ontario, Canada. She loves cooking up a storm over the campfire, taking in all the backcountry views, and enjoying a piña colada or two while relaxing at camp. She’s also certified in Whitewater Rescue (WWR) I & II and Wilderness First Aid (WFA).


